Maximize Your Garden Yield: Soil Testing Tips for Early 2025

Maximize Your Garden Yield: Expert Tips for Soil Testing in Early 2025 focuses on how soil testing is crucial for optimizing garden health and productivity, providing insights into nutrient levels, pH balance, and potential contaminants to ensure a thriving garden in the upcoming year.
Want to achieve a bountiful garden next year? The key to unlocking your garden’s full potential lies beneath the surface: the soil. Maximize Your Garden Yield: Expert Tips for Soil Testing in Early 2025 involves understanding your soil’s composition, nutrient levels, and pH balance, which will allow you to make informed decisions and optimize your soil for healthy plant growth and abundant harvests.
Why Soil Testing is Essential for Garden Planning
Soil testing is the cornerstone of successful gardening, providing valuable insights into what your soil needs to support healthy plant growth. Understanding your soil’s composition allows you to tailor your gardening practices for optimal results.
By testing your soil, you can address nutrient deficiencies, pH imbalances, and other potential issues that may hinder plant growth throughout the season. Let’s explore why this process is so important.
Understanding Soil Composition
A comprehensive soil test analyzes various components, including sand, silt, and clay, which affect drainage, aeration, and nutrient retention. Knowing your soil’s texture helps you choose appropriate plants and soil amendments.
Identifying Nutrient Levels
Soil tests reveal the levels of essential nutrients like nitrogen, phosphorus, and potassium (NPK), which are vital for plant growth. Adequate nutrient levels ensure plants develop strong roots, stems, and foliage, leading to higher yields.
- ✅ Regularly testing your soil helps avoid nutrient deficiencies that can limit plant growth and productivity.
- 🌱 Balanced nutrient levels contribute to robust plant health and disease resistance.
- 🧪 Soil testing ensures you’re not over-fertilizing, which can harm plants and the environment.
Regular soil testing should be a routine part of your gardening toolkit, offering insights that lead to greener, healthier plants and more abundant harvests season after season.
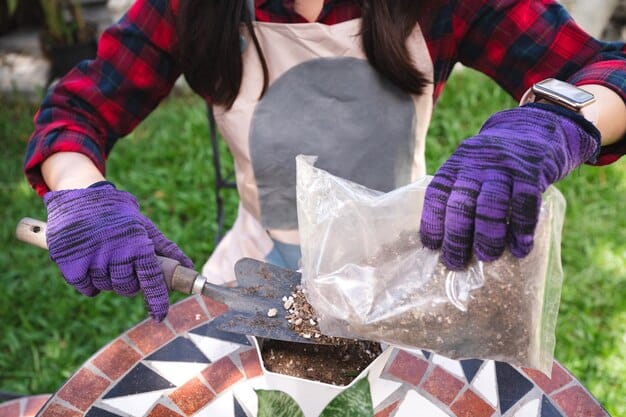
How to Collect a Soil Sample: A Step-by-Step Guide
Collecting an accurate soil sample is crucial for obtaining reliable test results. Follow these steps to ensure your sample accurately represents your garden’s soil.
Proper sample collection is essential for understanding the actual conditions of your growing medium. Let’s look at the best practices for getting it right.
Gathering Your Tools
Before you begin, assemble the necessary tools: a clean trowel or shovel, a bucket, and resealable plastic bags. Ensure the tools are free from contaminants that could affect the test results.
Collecting Multiple Samples
Take several samples from different areas of your garden, mixing them in the bucket to create a composite sample. Collect samples from a depth of about 6-8 inches, as this is where most plant roots grow.
- 🌱 Collect 5-10 samples from different areas to create a representative composite sample.
- 🧪 Avoid sampling near areas where fertilizers or amendments have been recently applied.
- ✅ Label the bag with your name, address, and the date of collection for accurate identification.
By following these guidelines, you’ll ensure that your soil sample accurately reflects the conditions in your garden, providing a solid foundation for making informed decisions.
Understanding Your Soil Test Results
Receiving your soil test results can seem overwhelming, but understanding the key metrics is essential for making informed decisions. Let’s break down the most important components.
Soil test results usually include information on pH, nutrient levels, and organic matter content. Knowing how to interpret this data is key to optimizing your soil health.
pH Levels
pH measures the acidity or alkalinity of your soil, with a scale ranging from 0 to 14. Most plants thrive in a slightly acidic to neutral pH range (6.0 to 7.0). Understanding your soil’s pH level will help you select appropriate plants and amendments.
Macronutrients and Micronutrients
Macronutrients like nitrogen (N), phosphorus (P), and potassium (K) are essential for plant growth, while micronutrients such as iron, manganese, and zinc are needed in smaller quantities. Your soil test results will indicate whether these nutrients are deficient, adequate, or excessive.
- 🧪 Consult the soil test report for specific nutrient recommendations based on your target plants.
- 🌱 Adjust soil pH using lime (to increase pH) or sulfur (to decrease pH) as needed.
- ✅ Add organic matter to improve soil structure, nutrient retention, and overall fertility.
Armed with a clear understanding of your soil test results, you can make informed decisions, adjusting your soil as needed to create the optimal growing environment for vibrant and productive plants season after season.
Choosing the Right Soil Testing Method
Different soil testing methods cater to various needs, from quick home tests to comprehensive laboratory analyses. Understanding your options allows you to choose the method that best suits your requirements.
Selecting the appropriate soil testing method ensures you receive the information necessary to make effective soil amendments. Let’s explore available options.
Home Soil Test Kits
Home soil test kits offer a quick and affordable way to assess basic soil properties like pH and nutrient levels. These kits usually involve mixing soil with a solution and comparing the resulting color to a chart.
Professional Laboratory Testing
Professional laboratory testing provides a detailed analysis of your soil’s composition, nutrient levels, pH, and organic matter content. These tests are more accurate and comprehensive than home kits.

- ✅ Consider the level of detail needed for your gardening goals when selecting a testing method.
- 🌱 Professional lab tests can identify potential contaminants or toxins in your soil.
- 🧪 Always follow the instructions provided with the chosen testing method for accurate results.
By considering the options and understanding what each method offers, you can choose the soil testing approach that aligns with your gardening goals and ensures a solid foundation for a thriving garden.
Amending Your Soil Based on Test Results
Once you have your soil test results, it’s time to take action and amend your soil accordingly. Proper amendments can correct imbalances, improve soil structure, and enhance nutrient availability.
Understanding the appropriate soil amendments ensures your plants receive the specific nutrients, pH balance, and soil structure they need for optimal growth.
Adjusting pH Levels
If your soil pH is too low (acidic), you can add lime to raise it. If it’s too high (alkaline), sulfur can be used to lower it. Follow the recommendations provided with your soil test results for precise application rates.
Addressing Nutrient Deficiencies
If your soil is deficient in specific nutrients, you can incorporate organic or synthetic fertilizers. Choose fertilizers that provide the necessary nutrients without over-fertilizing, which can harm plants and the environment. Always follow the instructions on the fertilizer label.
Improve soil structure, water retention, and nutrient availability with compost, well-rotted manure, or other organic matter.
- 🌱 Apply amendments evenly across the garden bed, incorporating them into the top 6-8 inches of soil.
- ✅ Always water thoroughly after amending the soil to help the amendments dissolve and distribute.
- 🧪 Re-test your soil after making amendments to ensure the desired changes have been achieved.
Armed with your soil test results and the right amendments, you can transform your soil into a thriving environment that supports healthy plant growth and abundant harvests.
Timing is Key: When to Test Your Soil
The timing of your soil test can significantly impact the accuracy and relevance of the results. Testing at the right time ensures you have ample opportunity to make necessary amendments before planting season.
Knowing when to test your soil allows you to align your gardening practices with seasonal changes, optimizing soil conditions throughout the growing season.
Fall Soil Testing
Testing your soil in the fall allows you to assess nutrient levels and pH before winter, giving you time to amend the soil during the off-season. This ensures that nutrients are available when plants need them in the spring.
Early Spring Soil Testing
Testing your soil in early spring, before planting, allows you to address any remaining issues after winter. This ensures that your soil is ready to support healthy plant growth as soon as the weather warms up.
- ✅ Avoid testing your soil immediately after applying fertilizers or soil amendments.
- 🌱 If you suspect a soil contamination issue, test your soil as soon as possible, regardless of the season.
- 🧪 Keep detailed records of your soil test results and amendments to track changes over time.
By aligning your soil testing schedule with the changing seasons, you can ensure that your soil is in optimal condition whenever your plants need it, setting the stage for another season of thriving growth and abundant harvests.
By understanding the need for early 2025 soil testing, proper testing techniques, and interpreting your soil results, you can transform your garden into a thriving, bountiful ecosystem for your plants.
| Key Point | Brief Description |
|---|---|
| 🌱 Soil Composition | Understanding the mix of sand, silt, and clay is vital for drainage, aeration, and nutrient retention. |
| 🧪 Nutrient Levels | Identifying key nutrients such as nitrogen, phosphorus, and potassium ensures healthy plant growth. |
| ✅ Soil pH | Measuring acidity or alkalinity helps in selecting the right plants and amendments for optimal growth. |
| 📅 Best Timing | Fall or early spring testing provides adequate time to amend the soil before the planting season. |
Frequently Asked Questions
▼
Soil testing helps determine nutrient levels, pH balance, and potential contaminants, ensuring optimal conditions for plant growth. It allows you to tailor your gardening practices for better results.
▼
The best times are in the fall or early spring. Fall testing allows for winter amendments, while early spring testing fine-tunes soil conditions before planting.
▼
Collect multiple samples from different areas of the garden at a depth of about 6-8 inches. Mix them in a bucket to create a composite sample for testing.
▼
Results indicate pH levels, nutrient deficiencies, and the presence of harmful substances. This helps you determine necessary soil amendments for healthy plant growth.
▼
Based on the test results, adjust pH levels with lime or sulfur, and incorporate fertilizers or organic matter to address nutrient deficiencies. Re-test to ensure improvements.
Conclusion
Soil testing is vital for any gardener looking to boost their garden’s yield and cultivate healthy plants. By adopting these expert tips for soil testing in early 2025, you ensure your garden is set up for success ensuring optimal growth and a bountiful harvest.


